Cropping, Photoshop - Tutorial #4
Cropping - this one is for you Bonnie!
Cropping is so much fun!!! It helps bring in your subject or center it the way you want. Cropping helps get rid of unwanted parts of a photo as well. One thing I always do when it comes to cropping is save the photo as a part B. For instance:
I have a photo called bonnie1.jpg - I am not quite satisfied with it so I decide to crop it, but what if I screw up? To prevent that I open bonnie1.jpg in photoshop. Go to file in the top left corner. Scroll down to save as. It will bring up the box to save the photo. RENAME your photo bonnie1b.jpg then hit save.
The photo in photoshop is now bonnie1b.jpg and not the original, so if you mess up horribly and cannot back up - then you can delete it and make another copy of the original. I do this with all my touching up until I get used to the process and feel comfortable enough with what I am doing. Just a safety precaution.
In photoshop there is a bar menu that comes up. The first section of that has a rectangular marquee tool, moving tool, lasso, magic wand, cropping tool, and slicer. In mine the crop is directly under the lasso. (If you put your courser over the objects it will bring up their names.)
Click on the courser tool. Then look at your picture and determine approximately where you want to crop the picture. I usually start at the top of the picture in the left hand corner. Click on the picture with the left click, hold it down as you drag to the far right corner - creating your square or rectangle. Don't worry if it is not perfect... you can still fix it.

Once you let go of the mouse the rectangle will remain there shading the part that will be cropped out and leaving the color vibrant where it will remain. If you are not satisfied you will notice a small square in each of the 4 corners and in the middle of the 4 sides. That square is where you can click on and drag in or out until you have it cropped perfectly. When you have it exactly where you want it then simply double click on the vibrant part. That will complete the crop.
If you determine that the crop is not what you wanted you simply go to where it reads Edit (next to file in the top left corner) and click on it. It will bring up a menu where the first option is UNDO CROP. If you decide you want to REDO the crop you can click on edit again and click on REDO CROP - or you and redo by re-selecting the cropped portion of your desire.
After you have the crop of your desire then go to file, click on it and then scroll down to save, click on it and save it at MAX 12. You usually want to save at the best resolution possible. I do anyway... Very rarely do I save at a lesser resolution unless for web purposes.
The other cool thing about saving the different versions is that you can use them for different purposes... Different angles and perspectives bring entirely whole new pics. Just a thought - especially if you are into scrapbooking! ;)


2 comments:
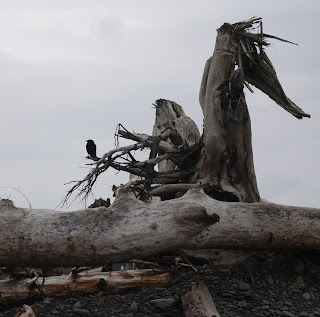
That was interesting. I didn't even notice the bird in the picture until after I saw the cropped one of the bird. Then I found the bird in the original. It really does make a whole new picture. :-)
Ok, now you are talking my language! That was cool! I DIDN'T even see that bird until you cropped and zoomed in like that! I too like that you can use one pictures for many different things. This opens up a lot of different possibilities. Amberlee is really good with taking and tweaking pictures too and showed me some things that she has done.
Post a Comment